
Propagation
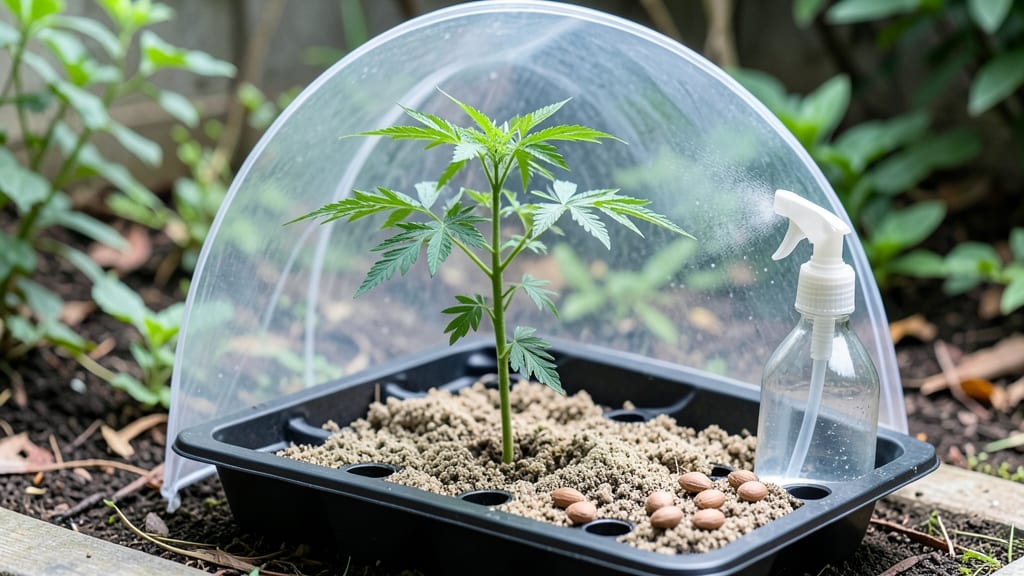
Mastering drumstick seed germination starts with the right soil setup—because even a 1°F temperature swing or slight moisture imbalance can cut your sprout rate in half.
If you’ve ever watched your 🌱 drumstick seeds sit stubbornly in damp soil for weeks without budging, you’re not alone. The issue isn’t the seeds—it’s the environment. Drumstick seeds need warmth, consistent moisture, and the perfect soil texture to break dormancy fast.
In this guide, I’ll walk you through the exact soil prep steps—from pH testing to organic matter ratios—that give you a 90%+ germination rate in just 7–14 days. No guesswork, no wasted seeds.
You’ll also discover the 3 biggest mistakes that kill sprouts before they start, plus alternative methods (like paper towel germination) for when your soil just isn’t cutting it.
Optimal soil conditions for drumstick seed germination (science-backed guide)
Getting your drumstick (moringa) seeds to sprout reliably starts with soil that mimics their natural tropical habitat. These seeds demand precise conditions—slightly acidic pH, loose texture, and consistent moisture. One wrong move, like compacted soil or incorrect pH, can drop germination rates from 90% to just 30%.
Let’s break down the exact requirements to create the perfect seedbed for your moringa.
First, the soil pH for drumstick seeds should sit between 6.0 and 6.8. This mild acidity helps nutrients dissolve efficiently, giving seedlings a strong start. Most garden soils lean slightly alkaline (7.0+), so you’ll likely need to lower the pH with elemental sulfur or peat moss.
Test your soil first—many garden centers offer affordable pH test kits that take minutes. If your soil tests at 7.5 or higher, you’ll need to amend it before planting.
Next, focus on soil texture. Drumstick seeds thrive in well-draining, loose soil that mimics their native sandy loam. Heavy clay or dense garden soil will suffocate roots and trigger seed rot. To improve drainage, mix in 20-30% perlite or coarse sand into your planting medium.
For container gardening, a blend of 60% coconut coir, 20% perlite, and 20% compost works perfectly. Avoid garden soil alone—it’s too compact for delicate moringa seedlings.
Moisture is another critical factor. Drumstick seeds need consistently damp soil, but never waterlogged. Think of a wrung-out sponge—your soil should hold moisture without pooling. Use a moisture meter or the "finger test": stick your finger 1 inch deep.
If it feels dry, water lightly. Overwatering causes anaerobic conditions, which smothers seeds and invites fungal diseases like damping-off. For containers, use pots with drainage holes and water only when the top inch feels dry.
Temperature plays a hidden but vital role. Drumstick seeds germinate best in soil that stays between 75–85°F (24–29°C). If your climate dips below 70°F (21°C), use a seedling heat mat ($10–$15) to maintain warmth.
In cooler zones, start seeds indoors under grow lights 6–8 weeks before your last frost date. Avoid placing trays on cold concrete floors—temperature fluctuations slow germination. Pro tip: Group trays together to create a microclimate that retains heat.
Don’t overlook organic matter—it’s the glue that holds your ideal soil together. Drumstick seeds need 20–30% compost or aged manure to access nutrients without burning tender roots. Avoid fresh manure (too hot) and synthetic fertilizers (can alter pH).
Instead, blend in worm castings or composted leaf mold for a gentle nutrient boost. This organic base also improves soil structure, helping roots penetrate easily. For containers, pre-mix your soil blend 1–2 weeks before sowing to let microbes activate.
One common mistake gardeners make is ignoring seed depth. Plant drumstick seeds just 1/4 inch deep—any deeper and they’ll struggle to break through. Gently press them into soil (don’t bury) and cover with a thin layer of vermiculite to retain moisture.
After sowing, mist the surface with a spray bottle to avoid displacing seeds. Place your tray in a clear plastic dome or seal a zip-top bag around it to trap humidity. Remove the cover once sprouts appear (usually in 7–14 days) to prevent mold.
To test your soil’s readiness, perform a simple percolation test. Dig a 6-inch hole, fill it with water, and time how long it takes to drain. Ideal soil drains in 2–4 hours. If water pools after 6+ hours, add more perlite.
For pH, use a digital pH meter ($15) for accuracy. Calibrate it with buffer solutions first. Remember: drumstick seeds are sensitive to salt buildup, so avoid over-fertilizing the soil before planting. A light hand with amendments ensures your seeds focus on sprouting, not recovering from chemical shock.
Finally, consider your location’s microclimate. Drumstick thrives in USDA Zones 6–10, but even within these zones, soil conditions vary. If you’re in a hot, dry area (like Arizona), mulch heavily to retain moisture. In humid zones (like Florida), ensure airflow to prevent fungal issues. For urban garden
Step-by-step soil prep process for drumstick seeds (with common pitfalls)
Preparing the right soil for drumstick seeds is the foundation of strong germination. These seeds need loose, nutrient-rich soil with excellent drainage to avoid seed rot or stunted growth. Skipping proper prep can reduce your germination rate by up to 50%—so let’s get this right from the start.
Start by choosing a location with full sun exposure (6+ hours daily) and well-draining soil. Drumstick plants thrive in sandy loam or slightly acidic to neutral soil (pH 6.0–7.5). If your garden soil is heavy clay or overly compacted, amend it before planting to mimic their natural tropical habitat.
-
Step 1: Clear the Area
Remove weeds, rocks, and debris from a 6-inch-deep planting bed. Use a garden fork to loosen compacted soil without turning it over. -
Step 2: Add Organic Matter
Mix in 2–3 inches of compost or well-rotted manure. For faster results, blend in 1 part coconut coir to improve aeration and water retention. -
Step 3: Adjust pH if Needed
Test soil pH with a kit. If below 6.0, add crushed limestone (1 lb per 10 sq ft). If above 7.5, work in peat moss or sulfur to lower it. -
Step 4: Pre-Soak Seeds (Optional)
Soak drumstick seeds in lukewarm water for 6–8 hours to soften the hard outer shell. This speeds up germination by 2–3 days. -
Step 5: Create Planting Holes
Dig holes ¼ inch deep and 3–4 feet apart (drumsticks grow tall!). Space rows 4–5 feet apart for airflow and sunlight access. -
Step 6: Mulch Lightly
Apply a 1-inch layer of straw mulch to retain moisture and suppress weeds. Avoid thick mulch—it can smother young seedlings.
One of the biggest mistakes gardeners make is overwatering during germination. Drumstick seeds need consistent moisture, but soggy soil leads to fungal diseases like damping-off. Water lightly every 2–3 days to keep the soil damp (not wet) until sprouts appear.
After planting, maintain soil moisture by watering deeply in the morning. Avoid overhead sprinklers, which can spread disease. Once seedlings emerge (typically in 7–14 days), thin them to 12 inches apart to reduce competition for nutrients.
Monitor soil temperature—drumstick seeds germinate best in 75–85°F soil. If your climate dips below 70°F, use a seedling heat mat or wait until warmer weather. Avoid planting in waterlogged or frozen soil, as it kills seeds before they sprout.