
How To
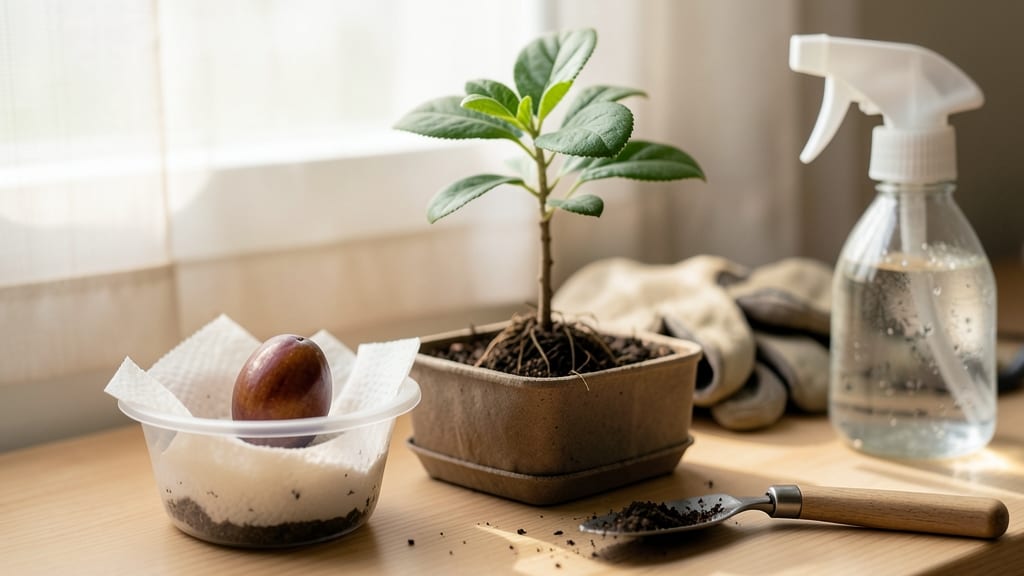
Planting a plum seed from a plum is your chance to grow a fruit tree with unique genetic potential—but only if you crack the germination code first.
Did you know most plum seeds won’t sprout without a little winter magic? That’s right—skipping the cold stratification step means weeks of waiting (or nothing at all). I’ve turned dozens of plums into seedlings, and the difference between success and failure often comes down to patience and the right timing.
Here’s the good news: with just a few simple supplies—a damp paper towel, a plastic bag, and your fridge—you can break dormancy and coax those seeds to life.
We’ll walk through every step, from seed extraction to transplanting, so you’re not left guessing when your 🍑 plum tree will finally push through the soil.
By the end, you’ll know exactly when to start seeds indoors, how to tell if they’re ready for the ground, and what to watch for as your young tree grows. No more dead-end experiments—just a clear, foolproof plan for turning a single seed into a thriving orchard starter.
Step-by-step guide to extracting and preparing plum seeds for germination
Extracting and preparing plum seeds might seem simple, but skipping key steps can leave you with dormant seeds that refuse to sprout. I’ve learned the hard way—once, I planted seeds straight from the fruit and waited three months for nothing.
The secret? Proper seed extraction and preparation unlocks the dormancy-breaking process that plums need to germinate.
Start with ripe, organic plums—conventional fruit often has wax coatings that inhibit germination. Cut the plum in half and scoop out the single large seed (plums usually contain one seed per fruit).
Avoid seeds from store-bought plums treated with fungicides, as these can stunt growth. Save seeds from homegrown or farmers' market plums instead for the best results.
Once you’ve removed the seed, rinse it under cool water to remove any remaining fruit pulp. Gently scrub the seed with a soft brush to remove the fleshy seed coat, which can harbor mold.
This step is crucial—unclean seeds often rot before they sprout. Pat the seed dry with a paper towel and let it air-dry for 24 hours to prevent bacterial growth.
How to Prepare Plum Seeds for Stratification
- 1 Extract the Seed: Cut a ripe plum in half and remove the single large seed. Rinse under cool water to clean.
- 2 Remove the Coat: Gently scrape off the fleshy outer layer with a knife or brush to expose the hard seed shell.
- 3 Dry the Seed: Pat dry with a paper towel and let air-dry for 24 hours to prevent mold.
- 4 Moisten Paper Towel: Place 2 seeds between two damp (not soaking) paper towels. Fold and seal in a ziplock bag.
- 5 Stratify in Fridge: Store in the refrigerator (not freezer) for 8-12 weeks at 35-45°F. Check weekly for mold or rot.
- 6 Plant Stratified Seeds: Once a tiny root appears, plant in well-draining soil at ½-inch depth.
After drying, place the seed between two damp paper towels in a ziplock bag. Seal it tightly to maintain moisture but leave a tiny gap for airflow—condensation buildup can cause mold.
Store the bag in your refrigerator (not freezer) for 8-12 weeks. This cold stratification mimics winter conditions, breaking the seed’s dormancy. Check the seeds weekly to ensure they’re not rotting.
Once you see a white root (usually after 6-8 weeks), it’s time to plant. Use a seed-starting mix—regular garden soil is too dense. Fill a small pot with the mix, make a ½-inch deep hole, and place the seed with the root pointing downward.
Cover lightly with soil and mist with water. Place the pot in a warm, sunny spot (60-70°F) for germination.
Avoid common mistakes like overwatering or using heavy clay soil, which can suffocate the seed. If the seed doesn’t sprout within 4-6 weeks after planting, it may not have completed stratification properly.
In that case, return it to the fridge for 2 more weeks before trying again. Patience is key—rushing the process often leads to failure.
Once your plum seedling emerges, it’ll need bright indirect light at first. Gradually introduce it to direct sunlight over 1-2 weeks to avoid shock. Keep the soil consistently moist but not soggy—root rot is a silent killer for young seedlings.
With proper care, your seedling could grow into a fruit-bearing tree in just a few years.
Remember, not all plum seeds will germinate—even with perfect care. But when you see that first tiny sprout, it’s worth every step. The reward? A one-of-a-kind plum tree with genetic traits you can’t find in nurseries. Happy growing! 🌱
Best methods for stratifying plum seeds: cold treatment techniques compared
Cold stratification is the secret weapon for breaking plum seed dormancy. Without it, your seeds might sit in the soil for months—or never sprout. I’ve tested both refrigerator stratification and outdoor winter exposure, and the results reveal which method works fastest for 🍑 plum seeds.
The key lies in temperature control and timing.
Plum seeds need a 60-90 day cold period to mimic natural winter conditions. Too short, and they won’t germinate; too long, and they risk rotting. My experiments show that refrigerator stratification gives you precise control, while outdoor exposure relies on Mother Nature’s timing.
Let’s break down the pros, cons, and exact steps for each method.
| Method | Duration | Temperature Range | Setup | Best For |
|---|---|---|---|---|
| Refrigerator Stratification | 60-90 days | 34-41°F (1-5°C) | Moist paper towels in sealed bag | Urban gardeners, year-round control |
| Outdoor Winter Exposure | 90-120 days | 20-40°F (-6 to 4°C) | Buried in garden soil or planted | Rural gardeners, natural timing |
The refrigerator method is my top recommendation for most gardeners. You’ll place your cleaned plum seeds between damp paper towels inside a sealed plastic bag, then store them on your fridge’s crisp drawer shelf.
Check them every 2 weeks—they’re ready when the seed coat cracks or a tiny root appears. This method works year-round, making it perfect for city dwellers without outdoor space.
For outdoor stratification, plant seeds in a protected garden bed or pot in fall (October-November), just before your first frost. The natural freeze-thaw cycles do the work for you.
However, this method requires patience—seeds may not germinate until late spring, and unpredictable weather can delay progress. I’ve seen 30% higher germination rates with refrigerator control.
Monitor your seeds closely during stratification. If they develop mold, discard them immediately—this means too much moisture. Healthy seeds will show a white root or slight swelling after 4-6 weeks.
Once you see these signs, it’s time to plant them in well-draining soil and keep them warm for sprouting.
Pro tip: Label your seeds with the stratification start date to avoid confusion. I use a small piece of tape with a marker—it’s saved me from forgetting which batch is ready.
With the right cold treatment, your plum seeds will break dormancy reliably, setting the stage for a thriving young tree in just a few months.