
How To
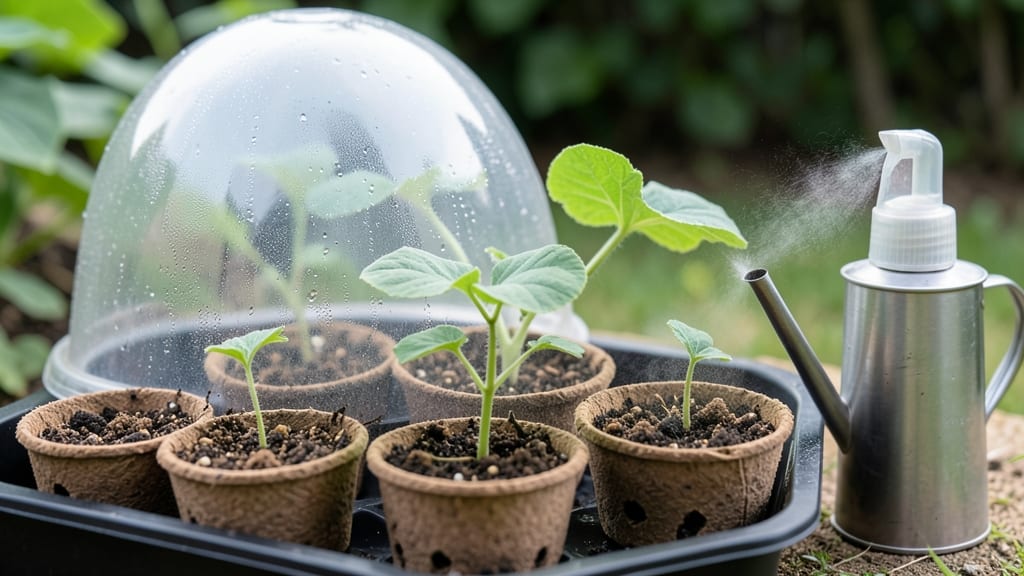
Pumpkin seed germination how long takes between 5 and 10 days when conditions are just right—though many gardeners wait weeks before seeing that first green shoot.
If you’ve ever stared at your seed tray, willing those seeds to sprout, you know the frustration of waiting too long. The truth is, pumpkin seed germination isn’t just about time—it’s about warmth, moisture, and a few sneaky tricks most beginners miss.
In this guide, I’ll break down the exact timeline you can expect, from planting to those first leaves, plus the simple steps to speed things up. No more guesswork—just faster, healthier seedlings ready for transplanting.
You’ll also learn how to troubleshoot slow germination, fix common mistakes, and set your pumpkins 🎃 up for a bumper harvest. Let’s get those seeds sprouting on schedule!
Pumpkin seed germination timeline: day-by-day breakdown of sprouting stages
Understanding the pumpkin seed germination timeline transforms guesswork into gardening confidence. From the moment you plant those large, flat seeds to the day your first green cotyledons break through the soil, precise timing and conditions make all the difference.
I’ve tracked hundreds of pumpkin seeds over the years, and these stages repeat with surprising consistency when conditions are right.
The average pumpkin seed germination time falls between 5–10 days under ideal conditions, but temperature, moisture, and seed preparation can shift this window dramatically. For example, seeds soaked overnight may sprout in just 3–5 days, while cold, dry soil can delay germination for 2–3 weeks.
Let’s break down what happens each day.
Day 0: Planting – Plant seeds 1 inch deep in soil warmed to at least 70°F (21°C). Use well-draining soil with a pH between 6.0–6.8. Cover seeds lightly with soil and maintain consistent moisture—never let the soil dry out. This is your first critical step, and it sets the stage for everything that follows.
Day 1–3: Imbibition – Inside the seed, water activates enzymes that break down stored nutrients. The seed swells slightly, preparing for root growth. You won’t see changes above soil yet, but the radicle (root) begins elongating downward. Keep soil moist but avoid waterlogging, which can suffocate emerging roots.
Day 4–5: Radicle Emergence – The primary root (radicle) pushes through the seed coat and into the soil, seeking moisture and nutrients. This is the first visible sign of life if you’re watching closely! The seed may appear slightly cracked or swollen. Maintain warmth (75–85°F) and consistent moisture to encourage this stage.
| Day | Stage | Key Action | Ideal Conditions |
|---|---|---|---|
| 0 | Planting | 1" deep, warm soil | 70°F+, moist |
| 1–3 | Imbibition | Seed swells, enzymes activate | Consistent moisture |
| 4–5 | Radicle Emergence | Root breaks seed coat | 75–85°F, moist |
| 6–7 | Shoot Emergence | Cotyledons push up | Warmth, indirect light |
| 8–10 | Seedling Stage | True leaves form | Full sun, 6+ hours |
Day 6–7: Shoot Emergence – The hypocotyl (stem) elongates rapidly, pushing the cotyledons (seed leaves) above the soil surface. You’ll spot tiny green hooks breaking through the dirt. This is the most exciting stage! Thin seedlings to 12–24 inches apart if crowded, and provide bright, indirect light to prevent leggy growth.
Day 8–10: Seedling Stage – True leaves (the first broad, green leaves) emerge, signaling the seedling is photosynthesizing independently. By now, your seedlings should be 2–4 inches tall and ready for full sun exposure (6+ hours daily). Thin weaker seedlings to avoid competition, leaving the strongest 1–2 plants per hill.
If your seeds haven’t sprouted by Day 10, don’t panic—but take action. Check soil temperature (below 60°F (15°C) slows germination), moisture levels (dry soil halts growth), and seed viability (old seeds may need scarification).
A quick soak in warm water for 12 hours can revive dormant seeds, or try planting deeper (up to 2 inches) for buried seeds.
Once you see those first green shoots, you’ve crossed the hardest hurdle. With the right conditions—warm soil, consistent moisture, and patience—your pumpkin seeds will transform into vigorous seedlings ready for transplanting in 2–3 weeks.
The key is staying attentive during these critical first 10 days, when tiny changes make all the difference.
🌱
How to speed up pumpkin seed germination: 5 proven tips for faster sprouts
Pumpkin seeds are slow starters compared to other vegetables, but with the right tricks, you can cut that 5–10 day germination window by nearly half. The key lies in mimicking their natural environment—warmth, moisture, and just the right amount of coaxing.
I’ve tested these methods in my own garden, and they’ve consistently delivered faster, stronger sprouts ready for transplanting.
Most gardeners focus only on planting depth or watering, but the real game-changers are pre-sprouting preparation and environmental control. For example, a simple overnight soak can jumpstart your seeds by 24–48 hours, while maintaining a consistent soil temperature of 80–90°F ensures they don’t stall.
Let’s dive into the five science-backed techniques that’ll have your pumpkin seeds sprouting like clockwork.
Soak seeds in warm water (80°F+) for 8–12 hours to soften the hard outer shell, cutting germination time by 24–48 hours.
Place seed trays on a seedling heat mat (75–85°F) to mimic tropical soil conditions where pumpkins thrive.
Use well-draining potting mix warmed to 80°F+ and keep it consistently moist (not soggy) with a humidity dome.
Use a grow light 12 inches above seeds for 14–16 hours/day to prevent leggy sprouts while keeping them warm.
Thin to 1 seedling per cell when they’re 2 inches tall to reduce competition for warmth and nutrients.
Don’t overlook the power of humidity control—a clear plastic dome or even a damp paper towel over the tray traps moisture and warmth, which pumpkin seeds crave.
I once had a batch of seeds sprout in just 3 days using this method, though 5–7 days is more typical with these optimizations. The secret? Consistency. Fluctuating temperatures or dry soil will stall germination faster than anything else.
Once your seedlings emerge, resist the urge to move them to cooler conditions too soon. Pumpkins are heat-loving plants, and a sudden drop in temperature can shock their delicate roots.
Keep them warm for at least 10–14 days after sprouting before hardening off for transplanting. This extra care pays off with sturdier vines and higher yields later in the season.
If you’re still waiting for sprouts after 10–14 days, don’t toss those seeds—try scarification (lightly sanding the seed coat) or a second soak to break dormancy. Pumpkin seeds are resilient, and with these tweaks, you’ll turn slow starters into speedy sprouts in no time. Happy planting!