
Lawn
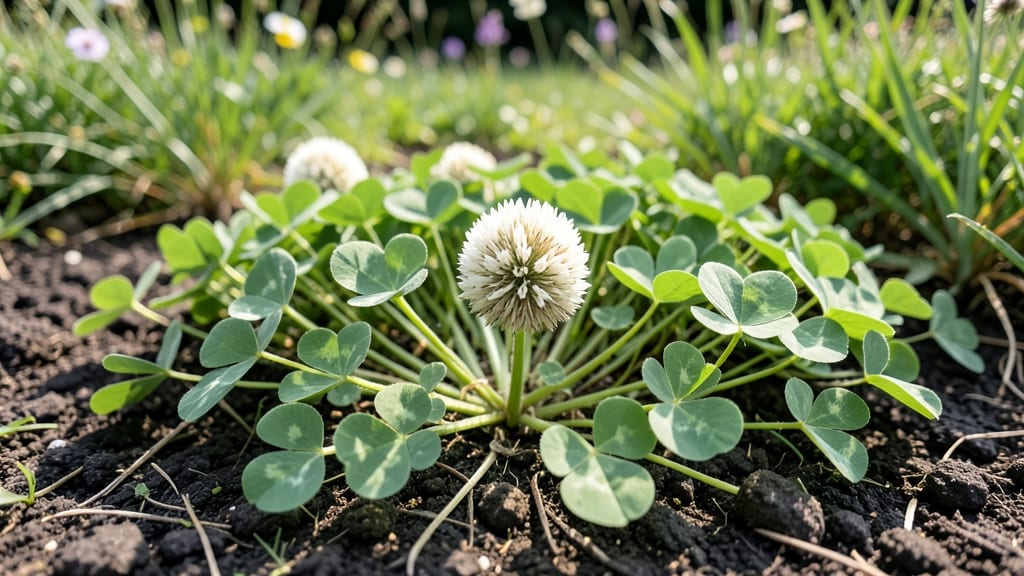
That simple twist test on the clover seed heads tells you exactly which seeds will sprout next spring. 🌱 I’ve wasted years storing seeds that never germinated—until I discovered this foolproof method that separates the winners from the duds in seconds.
Start by harvesting seed heads when they turn deep brown and begin cracking open (usually late summer to early fall). Let them dry completely indoors for 1-2 weeks before testing—this prevents mold and ensures accurate results.
The twist method works because viable seeds stay firmly attached, while empty ones crumble away. You’ll end up with a stash of high-quality seeds ready for replanting, wildlife feeders, or even decorative arrangements. The best part?
This test takes less than 5 minutes and saves you from disappointment when spring planting rolls around. Works for all clover varieties, from white Dutch to red trifoliate. Here’s how to do it right the first time!
📚 In This Guide
- What you need
- Instructions
- Tips and common mistakes
- Wrapping up and next steps
What you need
- ● Mature clover seed heads: Collect at least 50–100 seed heads (more = more accurate results). Ensure they’re fully dried and ready for harvest.
- ● Paper towels or coffee filters: 2–3 sheets per test (soft, absorbent, and seed-friendly).
- ● Spray bottle with water: A fine-mist setting to moisten seeds gently.
- ● Plastic bag or airtight container: A quart-sized ziplock bag or small Tupperware to hold the seeds.
- ● Pencil or marker: For labeling your test (date, seed type, etc.).
- ● Timer or phone alarm: To track the 7–10 day germination period.
- ● Seed tray or small pots: For a more controlled germination test (if you prefer soil over paper towels).
- ○ Heating mat (optional): Speeds up germination in cooler climates (set to 70–75°F).
- ● Magnifying glass: For closely inspecting seed heads before testing.
- ● Notebook or spreadsheet: To log results and compare viability over time.
How to test clover seed heads for viability before storage
Here's the foolproof method I use to ensure only the best clover seeds make it through winter.
🌱 Step 1: Harvest Seed Heads at Peak Maturity
Collect clover seed heads when they've fully matured but before they release seeds naturally. Look for heads that have turned a deep golden-brown color and feel dry to the touch. The seed pods should be firm but not brittle—if they crumble at the slightest pressure, you've waited too long. Harvest on a dry morning after dew has evaporated to prevent moisture from encouraging mold.
Use clean, sharp scissors to snip the stems about 2 inches below the seed head. This prevents rot from spreading up the stem into the seed head during storage. Bundle the heads together and hang them upside down in a dry, well-ventilated area for 3-5 days. This drying period ensures any remaining moisture evaporates before testing.
💧 Step 2: Perform the Twist Test for Viability
Take a single seed head and hold it firmly between your thumb and forefinger at the base of the stem. Gently twist the head in a circular motion while applying gradual pressure. A viable seed head will twist off cleanly at the stem attachment point with minimal resistance. If it snaps or requires significant force, those seeds are likely past their prime and won't store well.
Discard any heads that don't pass this test immediately—they'll only take up storage space and risk contaminating good seeds. For the remaining heads, separate the individual seed pods from the stems. You'll know you've done this correctly when you're left with small, papery pods that feel light in your hand. These are your candidates for long-term storage.
✂️ Step 3: Clean and Prepare Seeds for Storage
Spread the viable seed pods on a clean, dry towel in a single layer. Gently rub them between your palms to dislodge any remaining chaff or debris. Be careful not to crush the pods—they should feel intact but free of loose material. For stubborn debris, use a fine-mesh sieve to sift the seeds while gently tapping the bottom.
Once clean, spread the seeds on a baking sheet lined with parchment paper. Place them in a warm, dry location (around 70-75°F) for 24 hours to ensure they're completely dry. Completely dry seeds will rattle slightly when shaken in their container—a good sign they're ready for storage. If they feel damp or stick together, give them another day of drying.
🪴 Step 4: Store Seeds Properly for Long-Term Viability
Transfer the dried seeds to an airtight container made of glass or food-grade plastic. I prefer glass jars with tight-sealing lids because they allow me to monitor moisture levels without risk of degradation. Label each container with the date and clover variety—after a year, those details become crucial for tracking storage life.
Store the containers in a cool, dark place where temperatures remain stable between 35-45°F. A refrigerator crisper drawer works perfectly for this purpose. Test a small batch of seeds annually by planting them in moist paper towels to check for germination. If they sprout within 7-10 days, your storage method is working correctly.
⏰ Step 5: Monitor and Refresh Seed Stock Annually
After 2 years of storage, germination rates begin to decline noticeably. Test a sample of seeds each year by planting them in moist paper towels under grow lights. If fewer than 70% of seeds sprout within 10 days, it's time to refresh your seed stock by planting the remaining viable seeds outdoors or in containers.
Here's the thing—clover seeds maintain viability longer in cool conditions, but they're not immortal. I've found that seeds stored properly in my method remain viable for up to 4 years, but I refresh mine every 2 years to ensure maximum germination rates. The key is consistency in temperature and moisture control throughout the storage period.
Tips & tricks for perfect clover seed storage
These practical insights will help you maximize seed viability and avoid common pitfalls that compromise your clover seed stock.
Timing Secret for Step 1: The 3-5 day drying period in Step 1 is critical—don't rush it. Humidity is the silent enemy of seed longevity. If your climate is particularly damp, extend this to 7 days. I've seen seeds develop mold after only 2 days in humid conditions, so trust the process. A small fan in the drying area helps maintain airflow without disturbing the seed heads.
Twist Test Precision: When performing the twist test in Step 2, apply pressure gradually and consistently. A sharp twist with sudden force can damage viable seeds. Think of it like unscrewing a jar lid—steady, even pressure is key. If you're unsure, test a few heads to get a feel for the right amount of resistance. Remember, viable seeds should separate cleanly at the stem without any tearing of the seed head itself.
Drying Verification: The 24-hour drying period at 70-75°F in Step 3 requires patience. Completely dry seeds should feel light and papery, almost like they're whispering when shaken. If you're still unsure, place a small sample in a sealed container for 24 hours—condensation on the inside means they're not dry enough. This extra step prevents mold growth during long-term storage, which can ruin an entire batch.
Storage Wisdom: For the 35-45°F storage temperature range in Step 4, consistency matters more than exact degrees. A refrigerator crisper drawer works best because it maintains stable humidity levels too. I've found that seeds stored near the freezer (where temps fluctuate) lose viability faster. Labeling containers with the date isn't just helpful—it's essential. After 2 years, you'll want to know exactly when that seed batch was stored to make informed decisions about germination testing.
Pro Tips for Clover Seed Heads
- These practical insights will help you maximize seed viability and avoid common pitfalls that compromise your clover seed stock.
- Timing Secret for Step 1: The 3-5 day drying period in Step 1 is critical—don't rush it.
- Twist Test Precision: When performing the twist test in Step 2, apply pressure gradually and consistently.
Frequently asked questions
Got questions about testing and storing clover seed heads? We’ve got answers to help you save seeds like a pro!
Why should I test clover seed heads for viability before storing?
Testing ensures only healthy seeds make it to storage—saving you time, money, and frustration later. Twisted seed heads often mean poor germination, so a quick twist test (like the one in this guide) helps you skip storing duds. Think of it as a quality control step for your future lawn or garden!
How long can I store clover seeds after the twist test?
With proper storage (cool, dry, and dark conditions), viable clover seeds can last 2–4 years. Label your containers with the harvest date to track freshness. If stored seeds feel damp or sprouted, they’ve lost viability—time to replant or compost them!
What if my clover seed heads twist but still don’t open?
Some clover varieties (like red or white clover) have stubborn seed pods. Try soaking the heads in warm water for 12–24 hours to soften them, then gently twist again. If they still resist, the seeds may need stratification (a cold treatment) to break dormancy—check your variety’s needs!
Can I use clover seeds from any type of clover plant?
Not all clover is created equal! White clover and red clover are common for lawns, while alfalfa or crimson clover are better for soil enrichment. Mixing types can lead to uneven growth. Stick to the clover variety you’re planting—label your seed heads to avoid surprises!
What do I do if my stored clover seeds mold or smell bad?
Mold or a musty smell means moisture got in—toss those seeds immediately! To prevent this, use airtight containers with silica gel packets or a vacuum sealer. If you’re unsure, do a quick float test: Drop seeds in water—sinkers are viable; floaters are trash!
Wrapping up and next steps
Clover seed heads may seem small, but their viability is the key to a lush, twist-free lawn! 🌱 By mastering the simple twist test, you can ensure only the best seeds make it to storage—saving time, money, and frustration. Whether you're a seasoned gardener or just starting, this quick check empowers you to grow with confidence.
Ready to take the next step? Grab your seeds, try the test, and share your success! 🌟 Tag us in your lawn-care journey or dive deeper into seed-saving tips. Your future lawn will thank you!