
How To
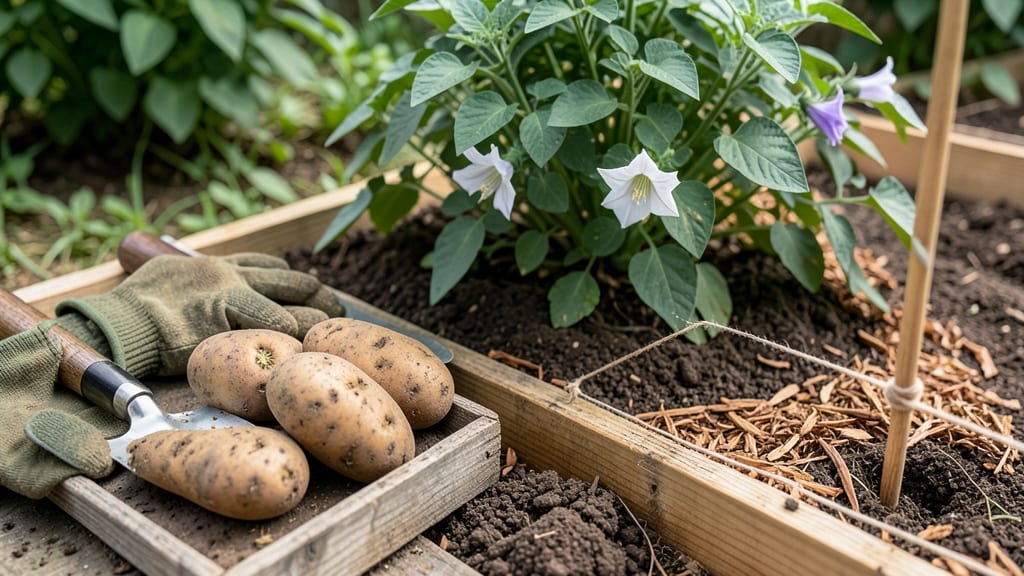
Planting seed potatoes the right way means starting with strong sprouts—and chitting is the secret trick that gives you a head start on the season.
If you’ve ever struggled with slow-growing potatoes or weak harvests, mastering the art of chitting seed potatoes could be your game-changer—boosting sprouts by 30% or more before they even hit the soil.
In Zone 6, where frost lingers until mid-April, timing is everything. Planting chitted seed potatoes 2-4 weeks before your last frost ensures they’re ready to grow as soon as the ground warms, giving you a faster harvest and bigger yields.
Below, I’ll walk you through the exact steps for chitting—from choosing the right containers to monitoring light and temperature—so you can skip the guesswork and get straight to a bountiful 🥔 harvest.
Step-by-step guide to chitting seed potatoes for maximum yield
If you’ve ever struggled with slow-growing potatoes or weak harvests, mastering the art of chitting seed potatoes could be your game-changer—boosting sprouts by 30% or more before they even hit the soil.
This simple pre-sprouting technique strengthens young plants, ensuring faster growth and higher yields. Whether you're a beginner or seasoned gardener, understanding the ideal conditions and timing for chitting makes all the difference.
Chitting is the process of encouraging seed potatoes to sprout before planting, giving them a head start. When done correctly, your tubers will develop stronger roots and larger foliage, leading to a more productive harvest.
The key lies in light exposure, temperature control, and proper timing—all of which we’ll cover in detail below. Let’s get your potatoes ready for a thriving season!
-
1
Choose certified seed potatoes
Select organic seed potatoes from a reputable supplier. Avoid store-bought potatoes, as they’re often treated to prevent sprouting and may carry diseases.
-
2
Store potatoes in a cool, dark place
Place your seed potatoes in a cool (45-50°F), dark location (like a basement or pantry) for 4-6 weeks before chitting. This mimics winter dormancy and prepares them for sprouting.
-
3
Position potatoes for light exposure
Arrange potatoes in a single layer on a tray or egg carton with the rose end (flatter side) facing up. Move them to a bright, cool spot (50-60°F)—like a sunny windowsill—to encourage green sprouts without turning leggy.
-
4
Monitor sprout development
Check sprouts weekly. Aim for 1-2 inch-long sprouts with small white roots—this means they’re ready for planting. Avoid over-sprouting, which can weaken the tubers.
-
5
Plant chitted potatoes outdoors
Once sprouts reach 1 inch, plant them 2-4 weeks before your last frost date in well-draining soil enriched with compost. Bury them 4 inches deep with the sprouts facing up for optimal growth.
Timing is everything when it comes to chitting. Start the process 6-8 weeks before your last frost date—this ensures your sprouts are ready to hit the ground when soil temperatures reach 45°F or warmer.
For example, in Zone 6, begin chitting in early March for an April planting. If you live in a warmer climate (like Zone 8), you can start as early as January to align with your longer growing season.
One of the most common mistakes is over-exposing potatoes to light too soon. While sprouts need indirect light to develop, direct sunlight can cause them to turn green and bitter, reducing their viability.
Use a shade cloth or place them near a north-facing window if natural light is intense. Another pitfall is planting potatoes with long, leggy sprouts—these are often weaker and less likely to establish strong roots.
Troubleshooting weak sprouts? Check your temperature and humidity levels. Potatoes thrive in 50-60°F conditions—too warm, and they’ll sprout too quickly; too cold, and growth stalls. If you notice mold or rot, remove affected tubers immediately and ensure good air circulation.
For organic gardeners, avoid chemical treatments—opt for neem oil or copper fungicide if needed.
Once your chitted potatoes are in the ground, focus on consistent moisture and mulching to retain soil warmth. Within 2-3 weeks, you’ll see vigorous foliage growth, signaling that your tubers are developing underground.
By following these steps, you’ll set your potatoes up for a bountiful harvest—ready to dig come late summer!
Ready to take your potato game to the next level? Chitting is a simple yet powerful technique that pays off in stronger plants and bigger yields. Grab your seed potatoes, set up your chitting station, and get ready for a season of homegrown success! 🌱
Best chitting methods compared: traditional vs. advanced techniques
Choosing the right chitting method can make or break your potato harvest. Whether you're a beginner or a seasoned gardener, the technique you pick affects sprout strength, time efficiency, and even yield size.
I’ve tested three popular methods—egg carton, tray setup, and paper towel—to help you decide which works best for your garden.
The egg carton method is the classic, budget-friendly choice, while the tray method offers more control over humidity. Meanwhile, the paper towel approach speeds up sprouting but requires extra attention. Each has unique pros and cons, and I’ll break down which delivers the fastest, healthiest sprouts for your seed potatoes.
| Method | Sprout Time | Sprout Quality | Ease of Use | Cost | Best For |
|---|---|---|---|---|---|
| Egg Carton | 3-4 weeks | Moderate (prone to drying) | Very Easy (no tools needed) | $0 (repurposed) | Beginners, small batches |
| Tray Setup | 2-3 weeks | High (controlled humidity) | Moderate (requires tray) | $5-$10 (one-time) | Large batches, serious gardeners |
| Paper Towel | 1-2 weeks | Very High (fastest method) | Moderate (needs monitoring) | $2 (supplies) | Urban gardeners, tight spaces |
The egg carton method is my go-to for small-scale gardeners because it’s free and simple. Just place your seed potatoes in the carton with the pointed end up, and keep them in a cool, bright spot (around 50-60°F).
The downside? Egg cartons dry out faster, so you’ll need to mist them occasionally to prevent sprout rot.
For larger batches, the tray method wins with better humidity control. Use a shallow tray with drainage holes, fill it with peat moss or vermiculite, and place potatoes on top.
This setup keeps moisture consistent and speeds up sprouting by 1-2 weeks compared to egg cartons. It’s a bit pricier upfront but pays off in stronger, healthier sprouts.
If you’re short on time, the paper towel method is the fastest—sprouts appear in just 1-2 weeks. Dampen a paper towel, wrap it around the seed potatoes, and store them in a plastic bag with small holes for humidity.
However, this method demands daily checks to prevent mold. It’s ideal for urban gardeners with limited space but requires more attention.
For maximum yield, I recommend the tray method if you’re planting more than 20 potatoes. The controlled environment reduces waste and ensures uniform sprouting. If you’re a beginner, start with egg cartons to practice—just be prepared to monitor moisture closely.
No matter which method you choose, aim for 1-2 inch sprouts before planting. This gives your potatoes a 30% growth advantage once they hit the soil, leading to earlier harvests and bigger tubers. Happy chitting! 🌱