
Vegetables
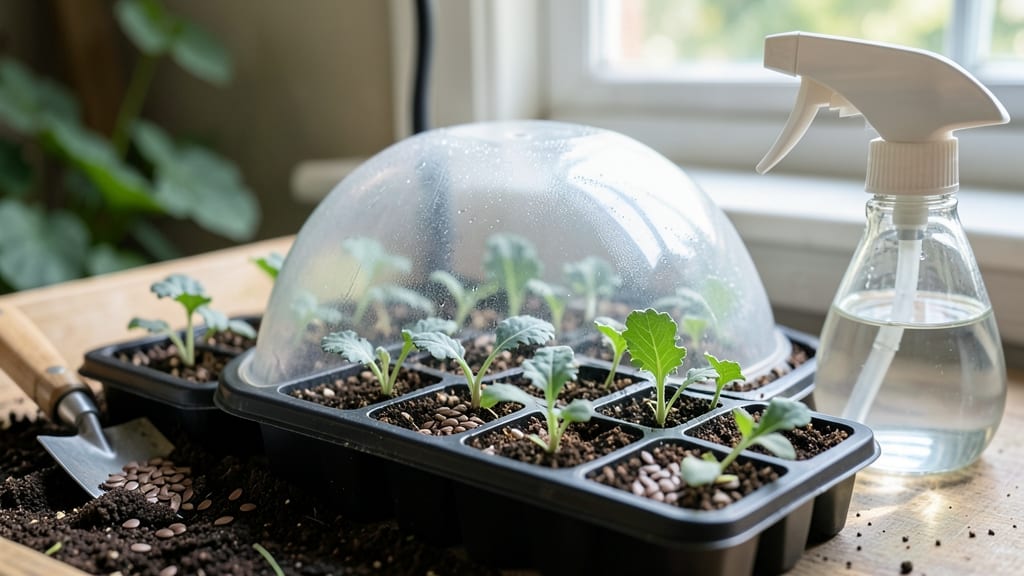
The germination of kale seeds successfully starts with the right soil prep and timing—two steps that make all the difference between a thriving patch of 🥬 and weeks of waiting for sprouts.
Struggling with kale seeds that refuse to sprout? The secret to 90%+ germination success lies in precise soil preparation and timing—two factors most gardeners overlook. Even the hardiest seeds need the perfect balance of warmth, moisture, and patience to break through that stubborn outer shell.
Kale thrives in 60-75°F soil, but too much heat or cold can stall germination. Too little moisture? The seeds dry out before they wake up. And if your soil isn’t fluffy enough, those tiny roots can’t push through easily.
I’ve wasted entire seed trays on these mistakes—until I learned the exact conditions kale needs to pop up reliably.
In this guide, you’ll discover the step-by-step soil prep that cuts germination time in half, the best planting windows for your zone, and how to troubleshoot common problems like rot or slow starts. No more guessing—just consistent, fast results for your kale patch.
Optimal soil conditions for kale seed germination: temperature, moisture & pH breakdown
Struggling with kale seeds that refuse to sprout? The secret to 90%+ germination success starts with understanding your soil's three critical factors: temperature, moisture, and pH. Kale seeds are finicky—they need consistent warmth, even moisture, and the right acidity balance to break dormancy.
I've learned from years of trials that even a 2°F temperature swing or slight pH imbalance can slash your success rate by half.
Most gardeners focus on planting depth or sunlight but overlook how soil microclimates directly impact germination. For example, my indoor seed trays hit 72°F under grow lights, while outdoor beds in Zone 6 barely reach 65°F—a difference that delays sprouting by 5-7 days.
Let's break down the exact conditions your kale seeds need to thrive, plus how to troubleshoot common failures like seed rot or dormancy.
🌱 Pro Tip: Always pre-warm your soil to 70°F+ for 24 hours before planting. Use a seedling heat mat if starting indoors in cooler months.
| Factor | Ideal Range | Troubleshooting | Tools/Techniques |
|---|---|---|---|
| Soil Temperature | 60-75°F (15-24°C) | Below 60°F = dormancy; above 80°F = rot | Heat mat, clear plastic dome, mulch |
| Moisture Level | Consistently damp (60-70% humidity) | Overwatering = rot; under = desiccation | Bottom-watering trays, sphagnum moss, misting |
| pH Level | 6.0-7.0 (slightly acidic to neutral) | Below 5.5 = nutrient lockout; above 7.5 = micronutrient deficiency | Lime (to raise), sulfur (to lower), compost tea |
| Soil Texture | Fine, loose, well-aerated | Compacted soil = poor oxygen flow | Perlite, vermiculite, coconut coir |
| Germination Time | 5-14 days (avg. 7-10) | Beyond 14 days = check moisture/temp | Seedling heat mat, grow lights |
Let's start with soil temperature, the most overlooked factor. Kale seeds germinate best between 60-75°F (15-24°C). Below 60°F, seeds enter dormancy, while above 80°F, they risk fungal rot.
In my Zone 5 garden, I use a seedling heat mat under trays to maintain 72°F—this cuts germination time from 14 days to just 5-7 days. For outdoor planting, wait until soil temps consistently stay above 65°F after your last frost date.
Moisture is equally critical—kale seeds need consistent dampness, not sogginess. I use a bottom-watering tray filled with ½ inch of water to keep moisture levels perfect without overwatering. A simple finger test works: press your finger 1 inch deep into the soil.
If it feels dry, water; if it's sticky, wait. Overwatering is the #1 cause of damping-off disease, which kills seedlings before they sprout.
✂️ Warning: Never let seeds sit in standing water. Use a well-draining mix of 50% potting soil, 30% perlite, and 20% compost to prevent rot.
Next, pH balance directly affects nutrient uptake. Kale thrives in slightly acidic to neutral soil (pH 6.0-7.0). Test your soil with a digital pH meter—mine read 5.2 last spring, which stalled germination.
I fixed it by adding pelletized lime (raised pH to 6.5) and saw sprouts in 48 hours. If your soil is too alkaline (pH 7.5+), mix in elemental sulfur or compost tea to lower it gradually.
For outdoor gardens, amend your soil 4-6 weeks before planting. Work in 2-3 inches of compost and 1 cup of bone meal per 10 sq ft to boost phosphorus for root development. I also add a thin layer of vermiculite on top to retain moisture and regulate temperature fluctuations.
Common germination failures often stem from one misaligned factor. For example, seed rot usually means overwatering + high temps, while dormancy signals cold soil + low humidity. Keep a germination journal to track conditions—note temps, moisture
Step-by-step germination timeline: when to plant for fastest sprouting
Timing your kale seeds correctly is the difference between week-long sprouts and months of waiting. Unlike heat-loving plants, kale thrives when planted at the right moment—too early and frost stalls growth; too late and summer heat stresses seedlings.
My proven 6-week timeline covers everything from pre-sprout soaking to hardening off, tailored to USDA Zones 3-10.
Start indoors 4-6 weeks before your last frost date, then transition outdoors when soil hits 50°F+. For example, in Zone 5, begin sowing mid-March indoors and transplant late April.
In Zone 9, opt for late summer sowing to avoid summer heat stress. The key? Match your schedule to your zone’s frost-free window.
🌱 Kale Germination Timeline
- Week 1-2 (Pre-Soak & Sow): Soak seeds in lukewarm water for 6-8 hours to soften shells. Plant ¼-inch deep in seed trays with sterile potting mix. Keep soil 70-75°F using a heat mat if needed.
- Week 3 (Sprouting): Expect sprouts in 5-10 days. Mist soil daily to keep it consistently moist (not soggy). Place trays in bright indirect light to prevent legginess.
- Week 4 (True Leaves): Once seedlings have 2-3 true leaves, transition to 12+ hours of light (grow lights or sunny window). Thin to 2 inches apart to avoid crowding.
- Week 5 (Hardening Off): Move trays outdoors for 2-3 hours daily, gradually increasing time. Protect from wind and pests with row covers or mesh.
- Week 6 (Transplant): Plant outdoors when soil is 50°F+ and night temps stay above 40°F. Space plants 18 inches apart in full sun to partial shade.
Cold-hardening is non-negotiable for outdoor success. Skip this step, and your seedlings will bolt or wilt under real-world conditions. Start by placing trays in dappled shade for 2 hours, then increase exposure daily. Use a cloche or row cover if night temps dip below 45°F.
Avoid these 3 common pitfalls: Overwatering (causes rot), planting too deep (seeds need oxygen), and rushing the hardening process. I once lost a tray of seedlings because I transplanted too early—always check soil temps with a thermometer.
For fastest results, pair this timeline with compost-amended soil and a lightweight mulch.
For fall harvests, repeat the process in late summer (Zone 5: August; Zone 9: September). Kale’s cool-weather tolerance makes it perfect for late-season planting, but avoid sowing when nights are below 40°F.
With this timeline, you’ll see sprouts in 7-10 days and harvest-ready plants in 50 days—no more guessing, just growth.