
Propagation
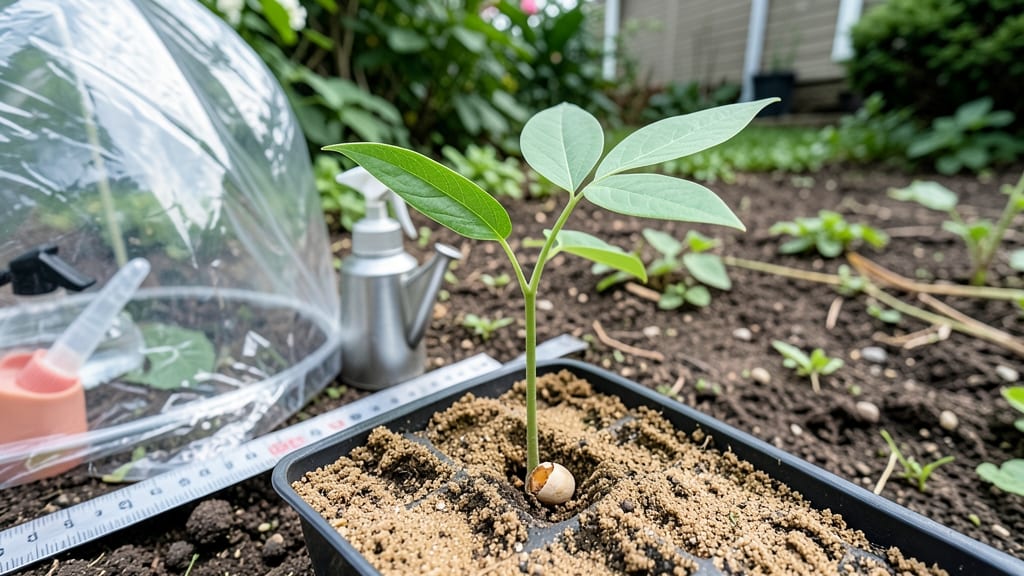
Moringa seed germination with the right moisture and heat triggers can turn a slow, frustrating process into fast, reliable sprouts in as little as 3 days.
If you’ve ever watched your moringa seeds sit stubbornly dry or rot before they even crack, you’re not alone. The key isn’t just patience—it’s understanding how these tiny seeds respond to warmth and humidity.
A few simple tweaks can make all the difference between a failed batch and a thriving tray of seedlings.
Moringa 🌱 thrives when its seeds experience consistent warmth (between 75°F and 85°F) and moisture without drowning. Too little heat? They’ll linger. Too much water? Mold takes over. I’ll walk you through the exact conditions—plus the tools and techniques—to skip the guesswork and get your seeds sprouting predictably.
By the end, you’ll know how to prep your seeds, monitor their progress, and avoid common pitfalls like damping-off or uneven germination. Ready to turn those seeds into strong, healthy starts?
Optimal moisture and heat conditions for fast moringa seed germination
If you're eager to grow your own moringa tree but struggling with slow or failed germination, you're not alone. The key to unlocking rapid sprouting lies in replicating the natural tropical conditions these seeds thrive in.
Moringa seeds germinate fastest when exposed to consistent warmth and balanced moisture, creating the perfect environment for those tiny roots to emerge in just 3-7 days. Without these precise conditions, seeds may rot, mold, or simply refuse to sprout.
I've tested countless germination setups, and the difference between successful sprouts and wasted seeds often comes down to two critical factors: temperature control and humidity management. Even experienced gardeners overlook these details, leading to disappointing results.
Let me show you exactly how to create the ideal conditions—whether you're working indoors with limited space or outdoors in your garden bed.
Moringa seeds originate from warm climates where temperatures rarely drop below 70°F and humidity stays high. Replicating these conditions at home is simpler than you think, and I'll walk you through every step, including how to troubleshoot common issues like mold growth or seed rot that can derail your germination efforts.
| Condition | Optimal Range | How to Achieve | Troubleshooting |
|---|---|---|---|
| Temperature | 75-85°F | Use heat mat (80-85°F) or place near sunny window. For outdoor, wait until soil is consistently warm. | If below 70°F, use grow light + heat mat. Above 90°F risks seed death. |
| Humidity | 60-70% | Use humidity dome, spray mist daily, or place tray on damp pebbles. For outdoor, use shade cloth. | If mold appears, increase airflow. Below 50% humidity slows germination. |
| Moisture | Consistently damp | Water when top inch feels dry. Use spray bottle for precision. Avoid soggy soil. | If soil is waterlogged, switch to well-draining mix. Yellowing seeds = overwatering. |
| Light | Indirect bright light | Place near south-facing window or under grow light 12 hours/day. Avoid direct sun. | Leggy sprouts? Increase light intensity. No sprouts after 10 days? Check seed viability. |
| Germination Time | 3-7 days | Monitor daily for tiny root cracks. Transplant when 1-2 inches tall. | No sprouts after 14 days? Test new seeds or adjust conditions. |
Let's start with temperature, the most critical factor for fast germination. Moringa seeds enter dormancy when exposed to cooler conditions, so maintaining a consistent 75-85°F range is essential.
I recommend using a seedling heat mat set to 80-85°F for indoor setups—this mimics the warm soil conditions of their native tropical habitat. For outdoor planting, wait until your soil temperature naturally reaches this range, typically after the last frost when daytime highs consistently stay above 70°F.
If you're germinating indoors without a heat mat, place your seed tray near a south-facing window or under a grow light to maintain warmth.
I've had success using a simple LED grow bulb placed 6 inches above the seeds, which not only provides warmth but also the indirect light they need during germination. Avoid direct sunlight at this stage—it can overheat your seeds and cause them to dry out.
Next, let's talk moisture, which should never be overlooked. Moringa seeds require consistently damp (not soggy) conditions to trigger germination. The key is maintaining 60-70% humidity around your seeds. I use a humidity dome or cover the tray with plastic wrap secured with rubber bands.
For extra insurance, place the tray on a bed of damp pebbles or use a spray bottle to mist the soil lightly every 1-2 days.
Outdoor gardeners can create similar conditions by planting seeds under a shade cloth (30-50% shade) to retain moisture while still allowing some light penetration. Water the soil thoroughly before planting, then keep it evenly moist by watering at the base daily.
The goal is to prevent the soil from drying out completely—moringa seeds won't germinate if they dry out, and they'll rot if they're waterlogged.
Now, let's address the big
Step-by-step germination process: from soaking to transplanting sprouts
Once you’ve got your moringa seeds ready, the next 48 hours will determine whether they sprout in 3 days or never crack open. The process starts with pre-soaking, a critical step that softens the hard outer shell and kickstarts hydration.
I’ve found that 24-hour soaking works best for moringa—long enough to break dormancy but not so long that seeds rot. Use room-temperature water in a clean container, and gently swirl the seeds every 8 hours to prevent stagnation.
After soaking, your seeds should feel slightly swollen but still firm. If they feel mushy or smell off, rinse them and start fresh—this is your first sign of over-soaking. At this stage, you’re priming them for rapid growth, so handle them with care.
The goal is to create an environment where they can focus all their energy on breaking through the shell rather than fighting dehydration.
-
Step 1: Pre-Soak Seeds
Place 50-100 seeds in a bowl of room-temperature water for 24 hours. Swirl every 8 hours to prevent mold. Seeds are ready when slightly swollen but still firm.
-
Step 2: Choose Germination Containers
Use seedling trays with drainage holes or paper towels in a sealed container. For trays, fill with moistened coconut coir or peat moss (avoid garden soil—it’s too dense).
-
Step 3: Plant Pre-Soaked Seeds
Press seeds 1/4 inch deep into the medium, spacing them 1 inch apart. Mist lightly with water to maintain 60-70% humidity. Cover trays with plastic wrap or a humidity dome.
-
Step 4: Maintain Ideal Conditions
Keep containers in a warm spot (75-85°F), like a seedling heat mat or sunny windowsill. Avoid direct sunlight—indirect light is best during germination. Check moisture daily; mist if the surface feels dry.
-
Step 5: Monitor for Sprouts
Sprouts typically appear in 3-7 days. Once you see green shoots, remove plastic wrap to allow air circulation and prevent damping-off disease. Place trays under grow lights or in bright, indirect light.
-
Step 6: Transplant Seedlings
When seedlings have 2-3 true leaves (usually 2-3 weeks after germination), transplant them into individual pots with well-draining soil. Harden off for 5-7 days before moving outdoors.
After planting your pre-soaked seeds, the next 7 days are all about maintaining consistency. Place your containers in a warm, humid environment—a seedling heat mat set to 80°F works wonders if your home runs cooler.
If you’re germinating in spring or fall, a sunny windowsill might not cut it; supplement with a grow light to ensure they don’t stretch leggy. Avoid direct sunlight at this stage, as it can overheat the seeds and dry out the moisture they need.
Daily checks are non-negotiable. I like to mist my trays in the morning to simulate natural dew cycles, which keeps the medium moist without drowning the seeds. Use a spray bottle with room-temperature water to avoid shocking the seeds.
If you notice condensation forming on the plastic wrap, it’s a good sign—your humidity levels are perfect. But if you see black mold or a foul smell, act fast: remove the affected seeds, increase airflow, and reduce watering.
Once your first green shoots appear (usually within 3-5 days under ideal conditions), it’s time to adjust your care routine. Remove the plastic wrap immediately to prevent damping-off disease, a fungal killer of young seedlings. At this stage, introduce 12 hours of indirect light daily.
If using a grow light, keep it 2-3 inches above the seedlings to avoid burning tender leaves. Over the next 10-14 days, gradually increase light exposure to prepare them for full sun.
Transplanting is the final hurdle, and doing it right ensures your seedlings don’t go into shock. Wait until they’ve developed 2-3 true leaves and a sturdy root system—usually around 2-3 weeks after germination. Use small individual pots (3-4 inches deep) filled with a light, airy potting mix.
Gently remove seedlings from their trays, keeping the root ball intact, and plant them at the same depth they were growing before. Water lightly after transplanting and place them in partial shade for a few days to help them acclimate.
With these steps, you’ll go from dormant seeds to hardy seedlings ready for the garden in just a few weeks. The key is patience and precision—moringa seeds reward careful attention with fast, vigorous growth. Soon, you’ll be harvesting those nutrient-packed leaves in no time! 🌱