
Planting
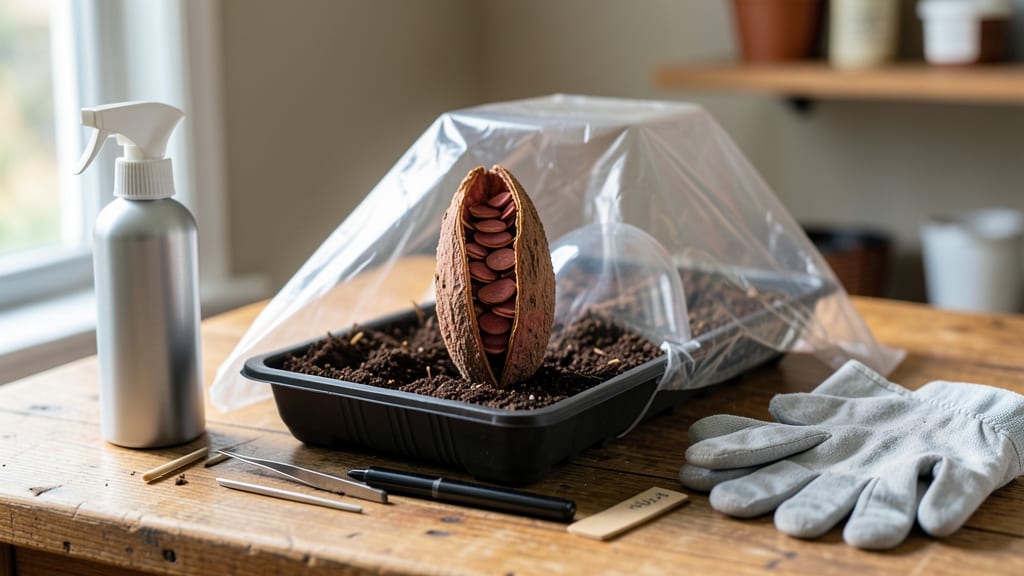
Planting magnolia seed pods is your chance to grow a stately tree from scratch—if you’re willing to wait for the slow but rewarding process.
Picture this: a 🌸 magnolia sprouting in your yard, its fragrant blooms drawing hummingbirds for decades. But here’s the catch—these seeds need patience and the right steps to break dormancy. Skip the stratification step, and you might be waiting years (or never see germination).
In this guide, I’ll walk you through extracting seeds, simulating winter’s cold to kickstart growth, and planting them in the perfect soil mix. You’ll also learn how to spot the first signs of life—because that tiny shoot is your future giant.
Ready to dive in? By the end, you’ll know exactly how to set up your seeds for success, avoid common pitfalls, and give your magnolia the best shot at thriving in Zone 6a or beyond.
Step-by-step guide to extracting and preparing magnolia seeds for planting
Growing a magnolia from seed is a rewarding but delicate process. The key to success starts with harvesting ripe seed pods—those that turn from green to brown and begin splitting open naturally.
If you pick them too early, the seeds won’t be ready to break dormancy, and if you wait too long, they’ll scatter on the ground. Aim for late fall (October-November) when pods are fully brown but still intact.
Once you’ve collected your pods, the next critical step is extracting the seeds. Inside each pod, you’ll find 1-3 large, dark seeds encased in a fibrous outer layer. Gently pry open the pod with your fingers or a small knife, then carefully remove the seeds.
Avoid damaging the seed coat, as this protects the embryo inside. Place the seeds in a paper towel to dry for 24 hours before moving to stratification.
Here’s where patience pays off: magnolia seeds require cold stratification to mimic winter conditions and break dormancy. Without this step, germination rates plummet. You’ll need to simulate 60-90 days of cold, moist conditions—think of it as tricking the seed into believing it’s winter.
This process is non-negotiable for most magnolia varieties, including Southern magnolias and saucer magnolias.
How to Extract and Stratify Magnolia Seeds
- Step 1: Harvest Ripe Pods
Collect fully brown seed pods from your magnolia tree in late fall. They should be dry to the touch but not yet split open. - Step 2: Extract the Seeds
Open pods with fingers or a knife. Remove 1-3 seeds per pod and let them air-dry on a paper towel for 24 hours. - Step 3: Prepare Stratification Mix
Combine equal parts moist peat moss and perlite in a sealed container. The mix should feel damp but not soggy. - Step 4: Place Seeds in Mix
Spread seeds 1 inch apart in the mix. Label the container with the date and seed type for tracking. - Step 5: Cold Stratify for 60-90 Days
Store the container in a refrigerator (35-40°F) or outdoor cold frame. Check moisture weekly—never let it dry out. - Step 6: Monitor for Sprouting
After stratification, transfer seeds to a warm, sunny spot (70-75°F). Germination can take 1-3 months—be patient!
During stratification, it’s tempting to check on your seeds daily, but resist the urge. Opening the container too often disrupts the moisture balance and temperature stability. Instead, set a reminder to check the mix every 2 weeks. If the top layer feels dry, lightly mist it with water.
If it’s too wet, add a handful of dry perlite to absorb excess moisture. The goal is to keep the environment consistently cold and damp, just like a winter forest floor.
After 90 days of stratification, your seeds are ready for the next phase: planting. But before you rush to the soil, take a moment to inspect each seed. Healthy seeds will feel firm and plump, while shriveled or moldy ones should be discarded.
Even after stratification, not all seeds will germinate—expect a 50-70% success rate with healthy seeds. This is normal, so don’t be discouraged if a few don’t sprout.
The moment you’ve been waiting for arrives when you spot the first green shoot breaking through the soil. This can happen as early as 4 weeks after removing seeds from stratification or take up to 3 months.
When this occurs, place your seedlings in a bright, indirect light spot (like a north-facing window) to prevent legginess. Avoid direct sunlight, which can scorch tender new growth. Use a grow light if natural light is insufficient.
Once seedlings reach 2-3 inches tall, they’re ready for their first transplant into individual pots. Choose containers with drainage holes and fill them with a mix of 50% potting soil, 30% perlite, and 20% compost.
This blend ensures aeration and moisture retention while mimicking the acidic, well-draining soil magnolias prefer in nature. Water gently after transplanting to settle the soil around the roots.
Remember, magnolia seedlings grow slowly—don’t expect rapid results. In their first year, you might see only 1-2 feet of growth, but with proper care, your tree will eventually reach 40-80 feet tall.
The patience you invest now will pay off with decades of fragrant blooms and shade for your garden. Now, grab those seed pods and get started—your future magnolia is waiting!
Best soil conditions and planting techniques for magnolia seed germination
Once your magnolia seeds have completed their 60-90 day cold stratification, it’s time to plant them in the ideal conditions for germination. The right soil mix and moisture balance are critical—too much water causes rot, while too little stalls growth.
I’ve found that a well-draining yet moisture-retentive mix works best, mimicking the forest floor where magnolias naturally thrive.
For containers, use a blend of 50% peat moss or coconut coir, 30% perlite, and 20% compost. This combination keeps roots aerated while holding enough moisture for delicate seedlings.
If planting directly outdoors, amend native soil with organic matter like leaf mold or compost to improve texture and fertility.
| Condition | Specification | Notes |
|---|---|---|
| Soil Type | Well-draining loam | Mix peat moss, perlite, and compost |
| pH Level | 5.0–6.5 (slightly acidic) | Test soil before planting |
| Moisture | Consistently moist (not soggy) | Use bottom-watering for containers |
| Sunlight | Partial shade (4–6 hours sun) | Avoid harsh afternoon sun |
| Planting Depth | 1/4–1/2 inch deep | Press seeds gently into soil |
| Container vs. Direct Sow | Containers preferred (easier moisture control) | Transplant seedlings outdoors after 2–3 months |
When planting, place seeds 1/4–1/2 inch deep in the soil. I recommend using biodegradable pots or seed-starting trays for individual seeds—this prevents overcrowding and makes transplanting easier later. If sowing directly outdoors, space seeds 6–12 inches apart to allow room for root development.
Moisture control is key during germination. Keep the soil consistently moist (not waterlogged) by checking daily. I use a spray bottle for gentle watering to avoid disturbing seeds.
A humidity dome or plastic wrap over containers can help maintain ideal conditions, but remove it once sprouts appear to prevent fungal issues.
For sunlight, magnolia seedlings prefer partial shade—think dappled light or morning sun with afternoon shade. In hot climates, even full shade works well until seedlings are established. If growing indoors, place trays near a north-facing window or under grow lights for 12–14 hours of light daily.
Germination can take 1–3 months, so patience is essential. Once seedlings reach 2–3 inches tall and have their first true leaves, they’re ready for transplanting outdoors. Harden them off gradually by exposing them to outdoor conditions for 1–2 hours daily over a week before permanent placement.