Flowers
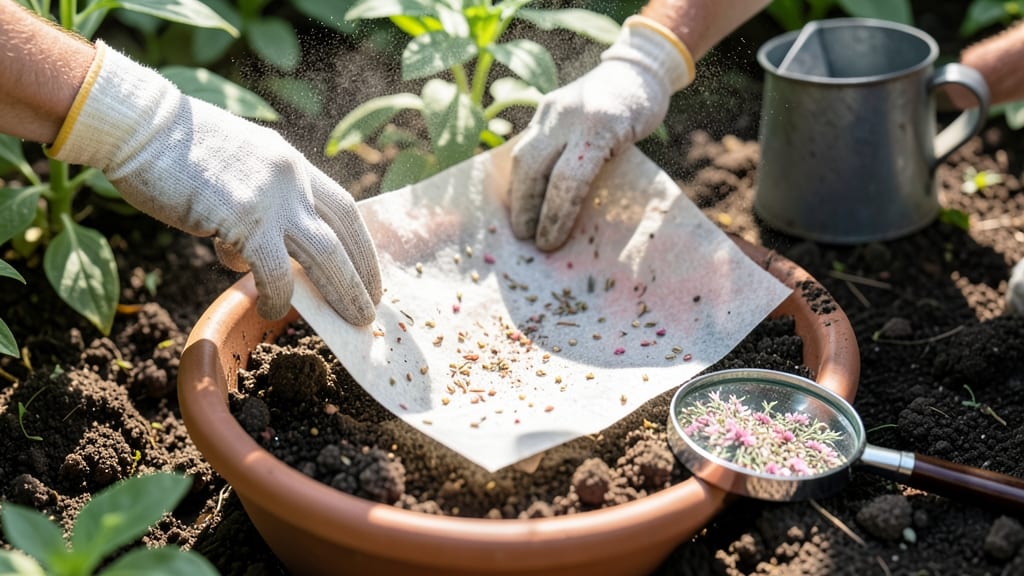
Seed paper flowers bloom twice—once as art, again as living plants. 🌸 These biodegradable creations turn your garden into an ever-changing display while leaving no trace behind. The magic lies in blending wildflower seeds with natural paper pulp, creating delicate blooms that dissolve into soil when planted.
You’ll need basic craft supplies: wildflower seeds, a blender, paper pulp, and a flower-shaped mold. The process is simple—mix seeds into the pulp, pour into molds, and let dry. Once hardened, these flowers resist rain, adding color to weddings, parties, or garden borders until you’re ready to plant them.
Each bloom becomes a miniature garden when watered, sprouting into wildflowers that attract pollinators. The best part? You control the final look—choose seeds for height, color, or bloom time. Perfect for eco-conscious gardeners who love both beauty and sustainability.
Works in containers, hanging displays, or directly in garden beds. Start with sun-loving seeds like cosmos or zinnias for guaranteed results. The only limit is your creativity—plant them as confetti, garlands, or even temporary garden markers.
📚 In This Guide
- What you need
- Instructions
- Tips and common mistakes
- Wrapping up and next steps
What you need
- ● Seed paper (pre-made or DIY): 1-2 sheets (or enough to cut into 5-6 flower shapes per sheet). Look for paper embedded with wildflower seeds (e.g., cosmos, sunflowers, or marigolds).
- ● Wildflower seeds: 1 tbsp (if making your own seed paper—mix with 1 cup water and 2 tbsp flour or cornstarch).
- ● Watercolor paints or natural dyes: 1-2 colors (e.g., lavender, gold, or pastel shades). Avoid plastic-based paints.
- ● Paintbrushes: 2-3 (fine-tip for details, medium for bases).
- ● Bone folder or credit card: 1 (for crisp folds).
- ● Scissors or craft knife: 1 pair (sharp for clean cuts).
- ○ Glue (optional): A small bottle of water-soluble glue (e.g., white glue diluted with water) for assembling layers.
- ● Ruler or template: 1 (for consistent flower shapes—think 3-4” diameter petals).
- ○ Hole punch (optional): 1 (for adding a stem or ribbon).
- ● Twine or dried flower stems: 1-2 pieces (for hanging or arranging).
- ○ Spray bottle (optional): 1 (to mist paper while folding for a smoother finish).
- ● Newspaper or parchment paper: 1 sheet (to protect your workspace).
Step-by-Step instructions for crafting seed paper flowers
Here's how to create durable, water-resistant blooms that double as living gifts.
🌱 Step 1: Prepare the Base Mixture
Combine 2 cups wildflower seeds with 1 cup water in a blender until you achieve a smooth, thick paste—like heavy cream. I like to add 1 tablespoon psyllium husk powder here for extra binding strength, especially if your paper will face rain. The mixture should cling together when pressed between fingers.
Spread the paste evenly onto a 12x12-inch sheet of unbleached paper (like coffee filters or handmade paper), leaving a ½-inch border around edges. Use a spatula to create thin layers for delicate petals or thicker sections for flower centers. Press gently to remove air bubbles—this prevents weak spots later.
💧 Step 2: Shape and Dry the Petals
While the paste is still damp, fold the paper accordion-style lengthwise, then cut into ½-inch-wide strips to form petals. Unfold and gently reshape each strip into a teardrop or curved petal shape. For layered blooms, overlap strips slightly at the base before pressing flat again.
Let the flowers dry completely on a wire rack in a 60-70°F space away from direct sun. They're ready when edges crisp slightly and no moisture remains when touched. Pro tip: Place a small weight (like a coin) on the centers while drying to maintain shape—this prevents curling.
✂️ Step 3: Assemble and Seal the Blooms
Arrange your dried petals into flower shapes, starting with the largest at the base. Use a water-based glue (like white glue diluted 50/50 with water) to secure overlapping edges. I find that brushing glue only on the underside of petals prevents visible residue on the front.
For extra durability, mist the assembled flowers with a 50/50 water and cornstarch solution while holding them under a heat lamp on low. This creates a subtle protective coating that repels light rain. Let dry completely before handling—wet paper loses its shape instantly.
☀️ Step 4: Plant and Maintain the Living Flowers
Plant your finished blooms directly into garden soil or a 4-inch pot with well-draining potting mix. Press lightly to ensure soil contact, then water gently until moisture reaches 1 inch deep. Place in full sun to partial shade—most wildflower varieties thrive with 4-6 hours of direct light daily.
Water only when the top ½ inch of soil feels dry. These flowers are drought-tolerant once established, but consistent moisture during the first 2 weeks ensures strong root development. You'll see green shoots emerge within 7-14 days, signaling successful germination.
Tips & tricks for perfect seed paper flowers
Between us, these little details make all the difference between delicate blooms and sturdy, rain-resistant flowers that actually grow.
Base Mixture Consistency: The paste should feel like thick, smooth pudding—not too runny, not too stiff. If it's too thin, add another ½ cup wildflower seeds and blend again. Too thick? Thin with 1 teaspoon water at a time until it flows like heavy cream. This consistency ensures even spreading on paper and prevents cracking during drying.
Drying Strategy: That 60-70°F range is critical—any hotter and your petals may crisp too quickly, any cooler and they'll stay damp forever. I've found placing a small fan on low setting near the drying rack helps maintain even airflow without disturbing the delicate shapes. Just keep it far enough to avoid blowing petals around!
Assembling Secrets: When arranging petals, start with the largest at the base and work your way up—this creates natural structure. For extra durability, brush a tiny amount of diluted glue on the back of each petal before attaching. This hidden reinforcement prevents layers from separating when wet. The cornstarch mist in Step 3 is your best friend for rain protection—just don't overdo it or the flowers will look dull.
Planting Preparation: Before planting, gently press the entire bloom into the soil to ensure full seed-soil contact. I like to make a small indentation with my finger first—this creates a pocket where seeds can nestle. Watering deeply right after planting (until moisture reaches 1 inch deep) gives roots an immediate drink, but resist the urge to overwater during those first 2 weeks.
Pro Tips for Seed Paper Flowers
- Between us, these little details make all the difference between delicate blooms and sturdy, rain-resistant flowers that actually grow.
- Base Mixture Consistency: The paste should feel like thick, smooth pudding—not too runny, not too stiff.
- Drying Strategy: That 60-70°F range is critical—any hotter and your petals may crisp too quickly, any cooler and they'll stay damp forever.
Frequently asked questions
Got questions about seed paper flowers?
You’re not alone! Here are answers to the most common queries to help you craft beautiful, eco-friendly blooms with confidence.
How long does it take for seed paper flowers to grow?
Seed paper flowers typically sprout within 7–14 days after planting, depending on sunlight, moisture, and seed type. Wildflower blends may take slightly longer (up to 3 weeks) as they contain mixed species. Keep the soil consistently moist during germination for best results!
Can seed paper flowers survive rain?
Yes! The paper dissolves quickly in water, releasing seeds into the soil. If planted in a protected spot (like a garden bed or pot), rain actually helps them grow. For outdoor displays, consider placing them under a small awning or overhang to preserve their shape until roots establish.
What’s the best way to plant seed paper flowers?
Press the paper lightly into damp soil (about ½ inch deep) or place it on top of compost. Water gently to avoid displacing seeds. For hanging flowers, attach them to a trellis or frame with biodegradable twine. Avoid direct sunlight for the first 24 hours to prevent drying.
Can I make seed paper flowers without a mold?
Use household items like:
- Plastic containers (yogurt cups, takeout boxes)
- Cookie cutters (for shaped flowers)
- Sponge or foam sheets (for texture)
Will seed paper flowers grow in cold weather?
Most seed paper flowers thrive in spring or fall when temperatures are between 50–75°F (10–24°C). For cooler climates, plant in late spring after the last frost. If you must plant earlier, use a cloche or row cover to protect young sprouts until they’re established.
What if my seed paper flowers don’t sprout?
Don’t worry—try these fixes:
- Check moisture: Keep soil damp (not soggy) for 2 weeks.
- Test sunlight: Move to a sunnier spot (6+ hours/day).
- Verify seeds: Some blends contain dormant seeds; try planting a backup batch.
- Patience: Some wildflowers take longer to germinate.
Wrapping up and next steps
Seed paper flowers aren’t just a creative craft—they’re a thoughtful way to brighten spaces while giving back to nature. 🌱 Whether you’re gifting them, decorating your home, or teaching kids about sustainability, these biodegradable blooms prove that small actions can make a big impact.
Ready to grow your green thumb? Try making a batch today, then plant them and watch your garden flourish—one petal at a time!
Next step:
- 🌿 Explore our guide on planting seed paper for best results.
- 📸 Share your creations with us—tag #SeedPaperFlowers!